Learn simple ways to turn on advanced inventory in QuickBooks enterprise
QuickBooks Enterprise comes with a lot of add-ons which you can avail yourself online. One such unique feature is the Advanced Inventory for checking the inventory of your firm on the multiple websites in case you are selling your products on different web portals. Basically, with Advanced Inventory, as understood by its name, you can be one step ahead and integrate all your inventories at once. It will even help in the long run for optimizing the economic order of quantities that helps in maintaining your stock. And below are some of the steps for you to turn ON the advanced inventory option in QuickBooks Enterprise version as soon as possible.
Thus, make sure to read this blog post carefully, or you can also get in touch with our support team via our toll-free number i.e. 1-844-521-0490, and they will clear all your clouds of confusion. Feel free to ring up today! Our experts and certified professionals will be happy to help you!
You may also see: Export your company data file from QuickBooks Online to desktop
What is advanced inventory in QuickBooks Enterprise?
Basically, the advanced inventory feature in QuickBooks Enterprise helps the user in maintaining and tracking the stock and also virtually moving the products. This tool can be integrated with much ease, and it can also be subscribed with new software in multiple ways. The users can either buy the program online or garner it in a package under platinum subscription option of Intuit. The inventory can be tracked by the users either from different site or locations. All that is required is the license key with advanced inventory features.
How beneficial is tracking inventory?
Tracking inventory carries a couple of benefits, a few of which we have listed below:
- It makes tracking stock in different locations possible
- User can easily scan the bar-code
- It enables the user to track the serial numbers or lot numbers
- Bin location can also be traced
- Advanced inventory feature allows the user to transfer the items between the inventory sites
- Also, it is possible to track inventory data in one place
If you are using QuickBooks Desktop Enterprise, you can purchase or subscribe to Advanced Inventory which enables you to use:
- FIFO costing
- Multiple location inventory
- Bar code scanning
- Bin or lot tracking
- Serial or lot numbers
Steps to Turn On the Advanced Inventory in QuickBooks Enterprise
- While you are operating your QuickBooks Enterprise, you will see the Editmenu button. Click and find Preferencesunder the same. Press left click on it to select that option.
- As the window pops up, move your cursor to the left panel to select Items & Inventory. This will change the right panel.
- You will see two divided sections named My Preferences and Company Preferences. You have to click on the Company Preferences.
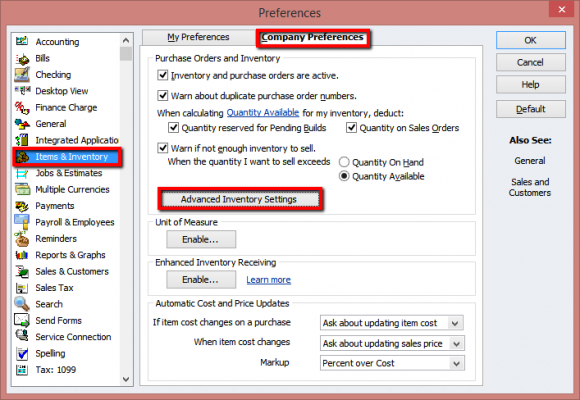
- The window after selecting company preferences will show four sections. At the bottom of the first section, you have to click Advanced Inventory Settingsoption.
- A new window pops-up, now enable the option of Multiple Inventory Sites is enabled under the heading of Multiple Inventory Sites.
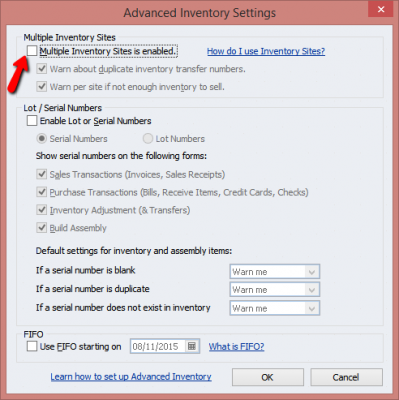
- After you have clicked the same, click Ok at the bottom of Advanced Inventory Settings window pane.
- Also, now click Ok on the right-hand side of the Preferences window pane.
For better implementation of this add-on, if you wish then you can close the QuickBooks Enterprise software running on your device, and if it does not close on time, you can always choose the task manager to end the running tasks.
After that, you can restart your device and then restart the QuickBooks Enterprise for smoothing working of this Advanced Inventory feature.
Though in some cases, while you are going through the above-mentioned steps, you might find certain difficulties like the Advanced Inventory Settingsoption might be gray in color and you will find that you are not able to click it to move the steps further.
If that is the case, you need not to worry.
Read Also: Steps to download and use QuickBooks component repair tool
Steps to Activate the Advanced Inventory Settings in QuickBooks enterprise
Follow this easy step and then you can go back to other main steps to be carried to activate the Advanced Inventory settings on your QuickBooks Enterprise version on your device.
- The user needs to align the license that they have got after buying the QuickBooks software, before the advanced inventory settings can work for the user
- For this, the user needs to visit the Help on the extreme right-hand side on your QuickBooks Enterprise version.
- And then, the user needs to click Manage My License, and then click Sync License Data Online.
Now you can go back to the Advanced Inventory Settings and complete the remaining steps.
However, another common set of problems is bound to appear too in case you are missing one piece of information or another. This could be from the purchase until the final installation of the QuickBooks Enterprise software on your working device.
Here, we have tried to discuss some of the most common and relatable issues with respect to the license not getting synchronized. To solve this issue, the user will have to know that the sync failure may occur in some computers originally due to several technical or incompatibility issues.
If you are unable to sync or you face sync failure error
Make sure to read the steps below carefully, it will help you solve such a problem in your windows system preferably.
- The first step is to Run Reboot.bat file
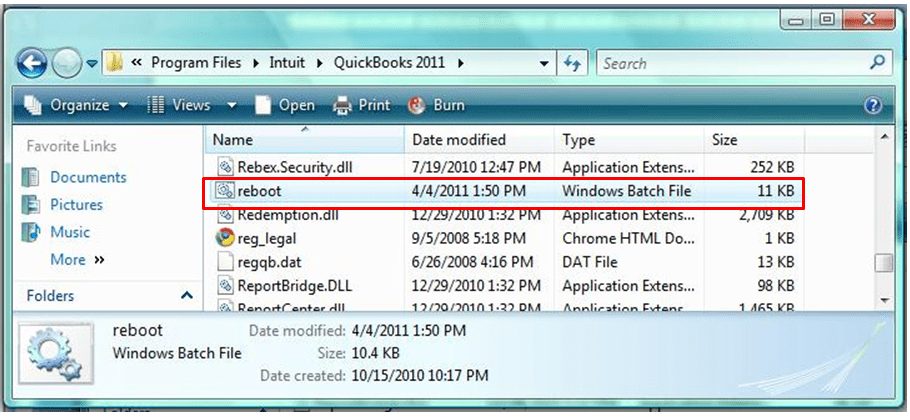
For a more detailed piece of information on running a reboot.bat file, you will have to comb over the proper steps given on the internet if you think you can handle the technicalities.
- After that Fix the Microsoft.NET Framework, MSXML, and/or other errors related to C++ language running on your device. You can use QuickBooks Install Diagnostic Tool for the same.
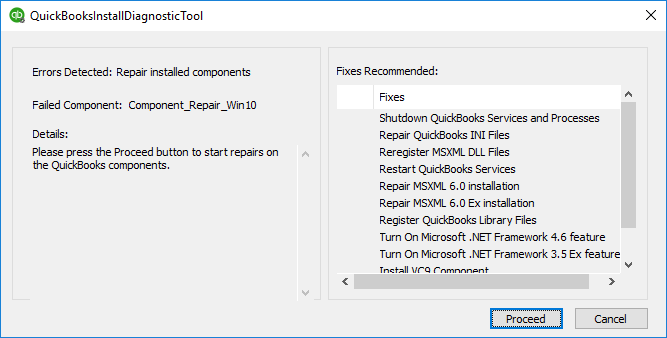
- You can also download and install the QuickBooks Tools Hub and run the Quick Fix my Program function
Here’s how:
- Download the QuickBooks Tool Hub file from here and save the file on your system
- After that open the downloaded file QuickBooksToolHub.exe.
- To run this tool on your system follow the on-screen instructions and agree the terms and conditions.
- Hit double-click on the tool hub icon to launch it.
- Now choose Quick Fix my Program option from Program Problems tab.
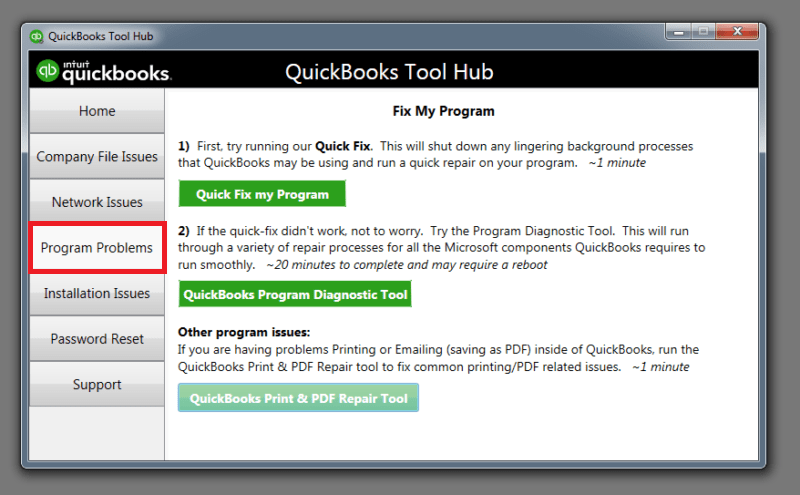
- And finally select the QuickBooks Program Diagnostic Tool.
Also read: How to fix QuickBooks Error 9999?
Conclusion!
These detailed steps can be confusing or frustrating for the first-timers or those who are not from the computer science or programming background. Therefore, it is highly recommended that in the case of undetected troubleshoots, you must either consult an expert in computer science/networking/ or make a call to the QuickBooks Enterprise customer support executive.
We have mentioned simple and quick step that you can use to turn on the QuickBooks enterprise advanced Inventory settings on for easy control and management of your inventory or stock being exchanged, purchased or sold over the internet on multiple web pages. In case of any further query, you can contact us on our 24×7 QuickBooks support line and speak to our certified technicians at +1(844)521-0490.
Topics You may also like